
Purpose
In this lesson, we are going to create the Augmented Reality Interface that will appear when scanning the bleams generated in Lesson 2.
The AR Studio allows to create an Augmented Reality interface, customizing it with the different available buttons.
Practice now
If you have not yet done, please click on the link below to download the ZIP file necessary for this lesson:
Detailed steps
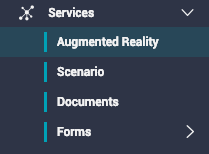
- In the platform menu, click on Services > Augmented Reality
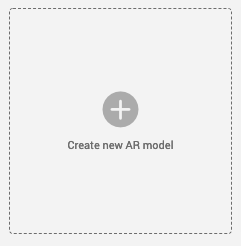
- Click Create new AR model button
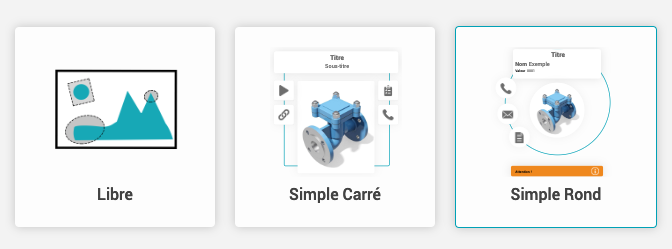
- In the pop-up, select the "Simple Rond" AR style
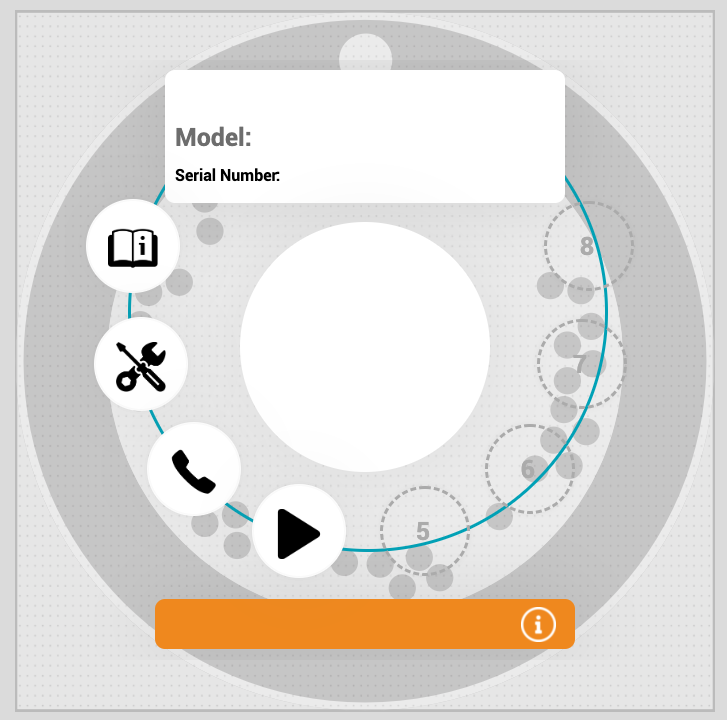
- In the AR Studio, customize the model as follows :
- In the General tab:
- Name: Information
- Add buttons:
- Add a button "File"

- In the Properties tab: Button Icon: click on Choose a file button > Upload the UserGuide.png attached to this article
- Add a second button "File"
- In the Properties tab: Button Icon: click on Choose a file button > Upload the InstallationManual.png attached to this article
- Add a button "Phone"

- In the Properties tab: Button Icon: click on Choose a file button > Upload the Phone.png attached to this article
- Add a button "Video"

- In the Properties tab: Button Icon: click on Choose a file button > Upload the Play.png attached to this article
- Add a button "File"
- Add text in the upper part rectangle of the Augmented Reality:
- Model:
- Serial Number:
- In the General tab:
The result of your AR cover should look like this:
Click on the Save button at the top right-hand side corner

Click on the Back button at the top left-hand side corner to exit the Bleam Studio

Next lesson
Lesson 4: Uploading your Documents and Pictures